






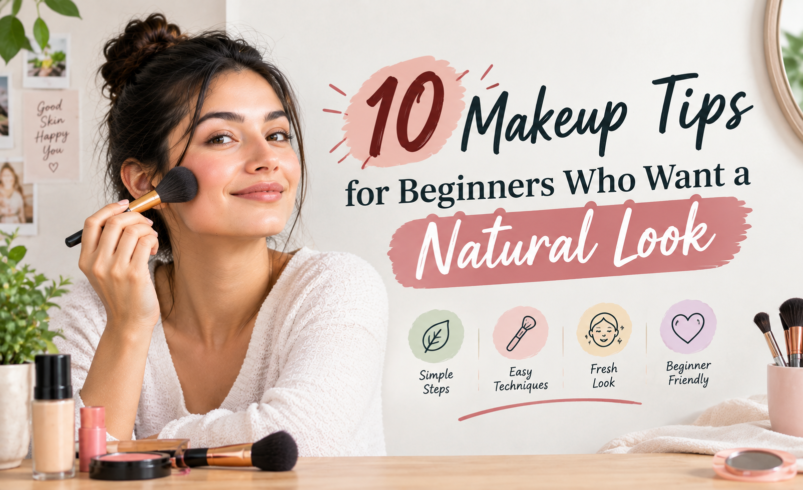

Standing in front of a makeup aisle — or worse, a hundred tutorial videos — when you’ve never really worn makeup before is genuinely overwhelming. Everyone seems to own fifteen products and know exactly what order they go in, and you just want to look like a slightly more awake, more even version of yourself without accidentally ending up with a face that looks like it belongs to someone else.
How can a beginner create a natural makeup look without using too many products or making it look heavy? The honest answer: start with far fewer products than you think you need, apply less of each one than feels intuitive, and learn the order before you learn the extras. A natural look is actually the easier place to start as a beginner, not the harder one — it forgives small mistakes, and it doesn’t demand precision the way a bold, defined look does.
This isn’t a tutorial that assumes you already know what a primer does or why blending matters. It’s built for someone starting from zero, with specific guidance on what to buy, how much to use, what order things go in, and the mistakes almost every beginner makes at least once.
People find waiting more tolerable when they can see the work being done on their behalf
“Labor Illusion” insight
1. Start With Skin, Not Makeup
What it means. Before you touch a single makeup product, your skin needs to be clean and moisturized. This isn’t a “skincare lecture” tacked onto a makeup article — it directly determines whether your makeup goes on smoothly or looks patchy within an hour.
How to do it. Wash your face, apply a moisturizer suited to your skin (a lightweight lotion is a safe default if you’re not sure), and apply sunscreen if it’s daytime. Then wait a few minutes — genuinely wait, don’t rush — until your skin doesn’t feel wet or tacky anymore.
Why beginners skip this. It feels like an extra step between you and the “real” makeup part. But foundation applied over dry patches or unabsorbed moisturizer is one of the most common reasons beginner makeup looks uneven, and it has nothing to do with the makeup itself.
Beginner-friendly amount. A pea-sized amount of moisturizer for your whole face is plenty for most people.
Quick takeaway: Good skin prep is invisible when it’s done right, and very visible when it’s skipped.
2. Choose a Lightweight Base Instead of Full-Coverage Foundation
What it means. For a natural look, skip your heaviest, most opaque foundation and reach for something sheer — a tinted moisturizer, a skin tint, or a lightweight, buildable foundation.
Why this matters for beginners specifically. Full-coverage foundation is actually harder to apply naturally, because any unevenness in your blending shows up clearly against a completely opaque base. A lighter formula is far more forgiving — it blends into itself and into your skin more easily, so small application mistakes are much less visible.
Foundation vs. skin tint for beginners:
|
|
Foundation (Sheer-Buildable) |
Skin Tint / Tinted Moisturizer |
|
Coverage |
Light to medium, adjustable by adding more |
Very sheer, minimal |
|
Best for beginners who… |
Have some redness or unevenness they want covered |
Have fairly even skin and just want a light “your skin but better” effect |
|
Forgiveness for mistakes |
High, since it’s still buildable |
Very high — extremely hard to apply too heavily |
|
Application |
Fingers, sponge, or brush |
Usually just fingers |
How much to use. Start with far less than you think — about a pea-sized amount for your whole face for a sheer formula. You can always add a small amount more to an area that needs it; you can’t easily remove excess once it’s blended in.
Common beginner mistake. Buying a full-coverage foundation because it seems like the “proper” choice, then applying it like a much lighter product would be applied — resulting in a heavy, uneven finish that’s hard to blend out.
Quick takeaway: A sheer, buildable formula is more forgiving for a beginner than a heavier one, even though it seems like the “less serious” option.
3. Learn Where Concealer Actually Goes
What it means. Concealer isn’t meant to go all over your face — it’s for specific spots: under the eyes, around the nose, on any blemishes, and anywhere with noticeably more discoloration than the rest of your face.
How to apply it as a beginner. Dot a small amount only where you need it, then pat gently with a fingertip or a small sponge — dragging or rubbing moves product around rather than blending it in.
Concealer vs. foundation for beginners. These aren’t interchangeable, and a common beginner mistake is treating them as though they are. Foundation evens out your whole complexion in a thin layer; concealer targets specific areas with more coverage than foundation alone provides. Used together, foundation goes on first (or sometimes isn’t used at all for a very light look), then concealer only where extra coverage is genuinely needed.
How much to use for under-eyes. A small amount — roughly the size of a grain of rice per eye — is usually enough. Going heavier here is one of the fastest ways to make a natural look stop looking natural, since it can settle into fine lines or look cakey by midday.
Common beginner mistake. Applying a large triangle of concealer under both eyes regardless of need, and applying it before checking whether you actually need coverage there that day.
Quick takeaway: Concealer is a spot treatment, not a second layer of foundation.
4. Learn the Basic Order — It Matters More Than You Think
What it means. Makeup products generally go on in a specific sequence, and applying them out of order is one of the most common reasons beginner makeup looks off without an obvious explanation why.
The general beginner order:
- Skincare (moisturizer, sunscreen) — wait for it to absorb
- Primer (optional — see the next tip)
- Foundation or tinted moisturizer
- Concealer, only where needed
- Setting powder, only where needed (usually just the T-zone)
- Eye makeup (eyeshadow, eyeliner, mascara)
- Eyebrows
- Blush
- Highlighter (optional)
- Lip product
Why the order matters. Applying powder before you’ve finished concealing, for example, can make it harder for concealer to blend in afterward. Doing eye makeup last (after your base) means any fallout from eyeshadow lands on already-finished skin, making it easy to clean up rather than smudging your base trying to fix it.
A note for beginners. This order isn’t a strict law — some professional artists do brows before base, for instance — but this sequence is a reliable, low-mistake starting point until you develop your own preferences.
Quick takeaway: Following a consistent order removes a surprising number of the small problems beginners run into.
5. Use Primer Only If You Have a Reason To
What it means. Primer isn’t a required step for everyone, especially not for a beginner still learning the basics. It’s a product that solves a specific problem — oil control, longer wear, or smoothing texture — and it’s easy to skip while you’re getting comfortable with everything else.
Hydrating primer vs. mattifying primer:
|
|
Hydrating Primer |
Mattifying Primer |
|
Best for |
Dry or normal skin |
Oily skin, or areas that get shiny during the day |
|
What it does |
Adds a smooth, slightly dewy base |
Helps control oil and extend wear |
|
Beginner note |
Easy to use — apply a thin layer after skincare absorbs |
Apply only to oily areas (usually the T-zone), not the whole face |
When to introduce it. Once you’re comfortable with the basic order above and have identified a specific problem you’re trying to solve — makeup fading fast, or an oily T-zone by midday — primer becomes worth adding. Before that, it’s one more variable competing for your attention.
Common beginner mistake. Buying primer because it’s frequently mentioned in tutorials, without a clear sense of what problem it’s meant to solve for your specific skin.
Quick takeaway: Skip primer until you know exactly why you’re using it — it’s genuinely optional at the start.
6. Groom Brows Instead of Drawing Them
What it means. As a beginner, brushing your eyebrows into place and filling only genuinely sparse spots looks far more natural — and is far more forgiving — than trying to draw a defined brow shape with a pencil.
How to do it. Brush brow hairs upward and outward with a spoolie brush (the small brush that often comes with brow products). If there are visible gaps, use short, light strokes that mimic individual hairs rather than solid color. A tinted brow gel is one of the easiest beginner products to use well, since it’s difficult to apply too heavily.
Why beginners struggle with brow pencils specifically. A hard-edged pencil line is unforgiving — small asymmetries between the two brows are much more visible with a defined shape than with soft, natural-looking fill.
Beginner-friendly amount. Less than feels right. Look at your brows from a normal distance (not up close in a magnifying mirror) — if they look filled in and not obviously “drawn,” you’ve used the right amount.
Quick takeaway: A brush and a light hand will make your brows look more natural than a pencil and a steady hand.
7. Keep Eye Makeup Soft and Simple
What it means. For a natural look, one neutral eyeshadow shade, softly blended, plus mascara does more than a multi-shade eyeshadow look — and it’s dramatically easier for a beginner to execute well.
A simple beginner eye routine:
- One neutral shadow shade (close to your skin tone or a soft brown) swept across the lid
- A slightly deeper shade of the same tone blended just into the crease, if you want a bit more dimension
- Mascara on the top lashes — one or two coats
Why this works for beginners. Blending is the hardest eyeshadow skill to learn, and using fewer shades means there’s less blending required and less chance of harsh lines between colors.
Common beginner mistake. Buying a multi-shade eyeshadow palette and trying to use several shades before learning to blend even one shade smoothly. It’s genuinely easier to master one shade first.
A note on eyeliner. If you want to add it, a soft brown or dark taupe pencil, smudged slightly with a cotton swab, is far more forgiving for a beginner than a precise black liquid liner — mistakes are much easier to soften or fix.
Quick takeaway: One well-blended shade beats three unevenly blended ones, every time.
8. Apply Blush Where a Natural Flush Would Actually Appear
What it means. Blush placement matters more than blush color for a natural result — placed correctly, even a slightly “wrong” shade can look believable.
How to do it as a beginner. Smile gently, and apply a small amount of color to the round part of your cheek (the “apple”), blending upward and outward toward your temple. Cream blush is often easier for beginners than powder, since it blends into skin more forgivingly with fingers and is harder to apply in an obvious, hard-edged circle.
Cream blush vs. powder blush for beginners:
|
|
Cream Blush |
Powder Blush |
|
Application |
Fingers or a damp sponge |
A brush, which requires more technique to control |
|
Forgiveness |
High — blends easily, hard to apply too precisely |
Can look more obviously placed if not blended well |
|
Best for beginners with… |
Normal to dry skin |
Oily skin, or those more comfortable with brushes already |
Common beginner mistake. Applying blush in a small, defined circle rather than blending it outward, which reads as an obvious application rather than a natural flush.
Quick takeaway: Blend further than feels necessary — blush that’s “spread too much” almost always looks more natural than blush left in a distinct shape.
9. Choose a Lip Product That Looks Like Your Lips, Just Better
What it means. For a natural look, a tinted lip balm or a sheer lipstick close to your natural lip color is easier to apply well and harder to get visibly wrong than a bold, precisely lined lip color.
How to do it. Apply directly from the product or with a fingertip for the most natural, slightly imperfect finish — precision isn’t the goal here, unlike with a bold lip color.
Why this is beginner-friendly. Lip liner and precise application matter much more with bold, opaque colors; a sheer, close-to-natural shade is far more forgiving of an uneven edge or slightly off-center application.
Common beginner mistake. Starting with a lip liner before knowing how to apply lip color confidently — for a natural look, you likely don’t need one at all yet.
Quick takeaway: Sheer and close to your natural color means small mistakes simply won’t be visible.
10. Practice the Whole Face Before an Important Day
What it means. Your first time doing a full face of makeup should not be the morning of an event you care about. Practice on an ordinary day when there’s no pressure and no timeline.
How to do it. Set aside twenty or thirty minutes on a day off, go through the order in Tip 4 slowly, and take a photo when you’re done — makeup often looks different in photos than in the mirror, and this is a low-stakes way to learn that.
Why beginners skip this and regret it. It’s tempting to save your first real attempt for a day that matters, assuming a tutorial or product description will be enough preparation. In practice, your hands need repetition — where to place blush, how much pressure to use blending, how much product actually looks like “a little” versus “a lot” — and that only comes from doing it more than once.
Beginner-friendly approach. Practice one or two new elements per session rather than the whole face every time — get comfortable with foundation and concealer first, then add eye makeup a few days later once that feels manageable.
Quick takeaway: Give yourself permission to practice badly a few times before you need it to go well.
What Makeup Products Should a Beginner Actually Buy?
A genuinely useful beginner kit is smaller than most tutorials suggest:
|
Product |
Why It’s Essential |
Beginner Tip |
|
Moisturizer |
The foundation for everything else |
Lightweight lotion is a safe default |
|
Sunscreen |
Daily skin protection |
Broad-spectrum SPF 30+, applied before makeup |
|
Tinted moisturizer or sheer foundation |
Evens tone without heavy coverage |
Start with less than you think you need |
|
Concealer |
Targeted coverage for under-eyes and blemishes |
Choose a shade close to your skin, not much lighter |
|
Mascara |
The single highest-impact, lowest-effort product |
One or two coats is usually enough |
|
Cream blush |
Adds natural color, forgiving to apply |
Blend with fingers, further out than feels necessary |
|
Tinted lip balm |
Natural color with hydration |
Great starting point before committing to lipstick |
|
A neutral eyeshadow |
Soft definition without complexity |
One shade is genuinely enough to start |
|
Brow gel |
Grooms brows without a steep learning curve |
Easier to use well than a pencil, as a beginner |
This is genuinely a complete natural-look kit. Everything else — primer, highlighter, eyeliner, additional eyeshadow shades — is worth adding later, once you’re comfortable with these basics and have identified a specific thing you want to improve or add.
Minimal Kit vs. Full Kit for Beginners
|
|
Minimal Beginner Kit (9 items above) |
Full Kit |
|
Learning curve |
Manageable — focuses on core skills |
Overwhelming at the start; too many decisions per application |
|
Cost |
Lower upfront investment |
Higher upfront investment, before knowing what you’ll actually use |
|
Natural look achievable? |
Yes — fully sufficient |
Yes, but not more so — extra products refine, they don’t unlock the look |
|
Best for |
Anyone starting from zero |
Someone who’s mastered the basics and wants to build further |
There’s no rush to the “full kit.” A natural look, specifically, does not require more products — it requires knowing how to use a few well.
How to Apply Foundation for Beginners (Step by Step)
- Start with clean, moisturized skin that’s had a few minutes to absorb product.
- Apply a pea-sized amount of foundation or tinted moisturizer to the back of your hand first — this makes it easier to control how much you pick up.
- Dot small amounts onto your forehead, cheeks, nose, and chin.
- Blend outward from the center of your face using a damp sponge, brush, or clean fingers — whichever you find easiest to control as a beginner (a damp sponge is often the most forgiving option).
- Check your jawline and hairline for any harsh edges and blend them out.
- Assess whether you need more coverage anywhere before reaching for concealer.
How to Apply Concealer for Beginners (Step by Step)
- Apply foundation first, and assess what still needs extra coverage.
- Dot a small amount of concealer only where needed — typically under the eyes, around the nose, and on blemishes.
- Pat gently with a fingertip or small sponge rather than rubbing.
- Set only the areas where you’ve applied concealer with a very light dusting of powder, if needed.
How to Apply Blush Naturally (Step by Step)
- Smile gently to locate the “apple” of your cheek.
- Apply a small amount of cream or powder blush directly to that spot.
- Blend upward and outward toward your temple using circular motions.
- Step back and check in normal lighting — blush should look like a flush, not a distinct shape.
How to Do Natural Eye Makeup for Beginners (Step by Step)
- Sweep one neutral eyeshadow shade across your lid with a fluffy brush.
- If desired, blend a slightly deeper shade of the same tone into the crease only.
- Curl your lashes if you use a lash curler.
- Apply one to two coats of mascara to the top lashes, wiggling the wand at the root before pulling through to the tips.
- Brush your brows into place and fill sparse areas lightly, if needed.
Common Mistakes Beginners Make (And How to Fix Them)
- Using too much product overall. Start with less than feels right — you can always add more.
- Skipping skin prep. Foundation applied over dry or unmoisturized skin looks patchy no matter how good the formula is.
- Applying concealer everywhere instead of where needed. It’s a spot treatment, not a second foundation layer.
- Not blending far enough out. Blush, foundation, and eyeshadow all look more natural when blended past where you think the edge should be.
- Buying a large eyeshadow palette before learning to blend one shade. Master one shade before adding more.
- Trying a full face for the first time on an important day. Practice ahead of time, without pressure.
- Using a bold lip liner and lipstick as a starting point. Sheer, close-to-natural shades are far more forgiving while you build confidence.
Frequently Asked Questions
How can I create a natural makeup look as a beginner? Start with a lightweight base (tinted moisturizer or sheer foundation), use concealer only where genuinely needed, keep eye makeup to one neutral shade plus mascara, and use cream blush and a tinted lip product. Less product, applied and blended well, looks more natural than more product.
What makeup products should a beginner buy first? A moisturizer, sunscreen, a lightweight tinted moisturizer or sheer foundation, concealer, mascara, cream blush, a tinted lip balm, one neutral eyeshadow, and a brow gel cover a complete natural look without unnecessary extras.
What order should beginners apply makeup in? Generally: skincare, primer (if using one), foundation, concealer, setting powder (only where needed), eye makeup, brows, blush, highlighter (optional), then lip product.
How much foundation should a beginner use? Less than feels intuitive — start with a pea-sized amount for the whole face with a lightweight formula, and add more only to specific areas if needed.
Do beginners need primer? Not necessarily. Primer solves a specific problem, like oil control or extended wear. It’s reasonable to skip it while you’re still learning the basic order and technique, and add it later once you understand what problem you’re trying to solve.
How can I stop my makeup from looking cakey as a beginner? Use less product than feels right, let skincare fully absorb before applying makeup, choose a sheer or lightweight base rather than full coverage, and set only the areas that actually need powder rather than your whole face.
What’s the easiest eye makeup for a beginner to do? One neutral eyeshadow shade swept across the lid, blended softly, plus mascara. This requires far less blending skill than multiple shades and still looks polished.
Should beginners use cream or powder blush? Cream blush is generally easier for beginners — it blends with fingers, is more forgiving of imprecise placement, and gives a natural, skin-like finish that’s harder to overdo.
How can I practice makeup without ruining it before an important event? Practice on ordinary days with no time pressure, well before any event that matters. Try one or two new techniques per session rather than the whole face at once, and take photos to see how it reads beyond the mirror.
Is a natural makeup look actually easier for beginners than other styles? Generally, yes. It’s more forgiving of small application mistakes, doesn’t require precise lines or advanced blending, and uses fewer products — all of which make it a more realistic starting point than a bold or heavily defined look.