
The Automation Gap Most Businesses Are Still Missing in 2026
Here’s a number that should make you stop scrolling: businesses that deploy AI automation workflows save an average of 30+ hours per week on repetitive tasks — tasks like qualifying leads, drafting emails, responding to support tickets, and updating CRMs.
Yet most entrepreneurs, marketers, and small business owners are still doing all of this manually.
The gap isn’t knowledge. It’s tooling.
If you’ve heard of Zapier or Make but felt limited by their AI capabilities — or if you’ve tried to “vibe code” a Python automation script and hit a wall — there’s a better way. It’s called n8n, and in 2026, it has quietly become the most powerful open-source tool for building real AI agents without needing a computer science degree.
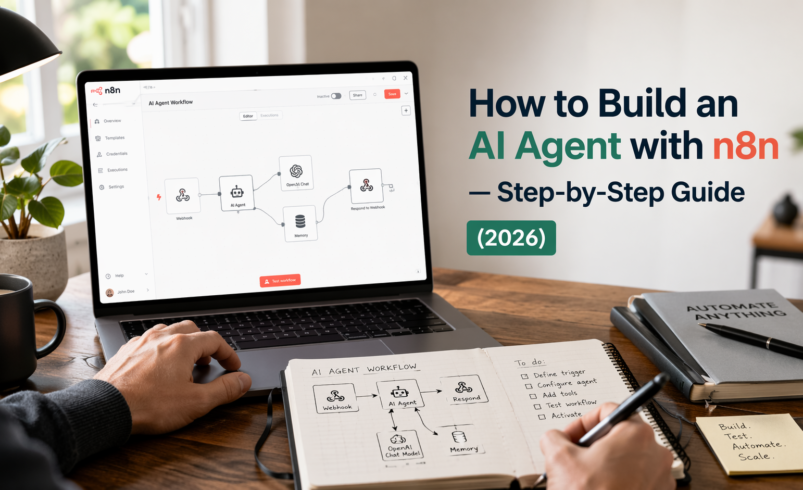
In this guide, you’ll learn exactly how to build a fully functional AI agent using n8n and OpenAI — from zero to deployed, step by step. Whether you want to build an AI customer support bot, a lead qualification agent, or a content generation pipeline, this article covers everything you need.
By the end, you’ll have: – A working n8n AI agent you can actually use in your business – A clear understanding of how AI agents work (without the jargon) – Confidence to build and scale more complex automation workflows
Let’s get into it.
The purpose of AI is to amplify human ingenuity.
— Satya Nadella
What Is an AI Agent? (And Why It’s Different From Basic Automation)
Most people confuse automation with AI agents. They’re related, but not the same.
Traditional automation follows a fixed script: If X happens, do Y. It’s deterministic. Predictable. And completely helpless when something unexpected comes up.
An AI agent, on the other hand, can reason about a situation, decide what to do next, use tools, handle edge cases, and even hold a multi-step conversation. It doesn’t just execute — it thinks (within the bounds of what you design).
A Simple Definition
An AI agent is a software system that perceives inputs, reasons using a language model, and takes actions — autonomously — to achieve a defined goal.
Real-World AI Agent Examples
- Customer Support Agent: A user sends a message on your website. The agent reads it, understands the intent, pulls from your knowledge base, and replies — or escalates to a human if needed.
- Lead Qualification Agent: A new form submission arrives. The agent scores the lead based on your criteria, enriches the data from LinkedIn, sends a personalized intro email, and adds the contact to your CRM.
- Content Pipeline Agent: You input a topic. The agent researches it via web search, writes a first draft, formats it for your CMS, and notifies your editor via Slack.
- E-commerce Support Agent: A customer asks about their order. The agent queries your database, interprets the status, and replies naturally — no human needed.
All of these can be built with n8n. That’s exactly what this guide will show you.
Why Use n8n for AI Agents?
You might be wondering: why n8n specifically? Why not Zapier, Make, or just a Python script?
Fair question. Here’s the honest answer from someone who has built workflows in all of these tools.
n8n Is Open-Source — And That Matters
n8n is fully open-source under a fair-code license. You can self-host it on your own server, giving you: – Complete data privacy — no third-party sees your workflow data – No per-operation pricing — self-hosted n8n costs only what your server costs – Full code access — modify nodes, build custom integrations, extend anything
This is a major advantage over closed platforms like Zapier, where your data passes through their infrastructure and costs scale per task.
Native AI Agent Support
In 2024–2026, n8n invested heavily in native AI capabilities. Today, it includes: – A dedicated AI Agent node with built-in memory and tool use – Direct integrations with OpenAI, Anthropic, Google Gemini, and Ollama – Vector store support for RAG (Retrieval-Augmented Generation) workflows – LangChain-compatible architecture under the hood
No other no-code tool comes close to this level of AI flexibility.
The Developer-Friendly Middle Ground
n8n sits between “too simple” (Zapier) and “too complex” (custom code). You can drag, drop, and connect nodes visually — but you can also write JavaScript expressions, custom functions, and even call APIs directly. It’s the best of both worlds.
n8n vs Zapier vs Make: Which Should You Use?
Let’s compare the three major automation platforms head-to-head.
|
Feature |
n8n |
Zapier |
Make (Integromat) |
|
Pricing |
Free (self-hosted) / ~$24/mo cloud |
From $29.99/mo |
From $9/mo |
|
AI Agent Node |
✅ Native, full-featured |
⚠️ Limited, add-on |
⚠️ Limited |
|
Open-Source |
✅ Yes |
❌ No |
❌ No |
|
Self-Hosting |
✅ Yes |
❌ No |
❌ No |
|
Custom Code |
✅ JavaScript/Python nodes |
❌ Very limited |
⚠️ Limited |
|
LLM Integrations |
✅ OpenAI, Anthropic, Gemini, Ollama |
⚠️ OpenAI only |
⚠️ OpenAI only |
|
Scalability |
✅ High (self-hosted) |
⚠️ Pricing limits |
⚠️ Moderate |
|
Ease of Use |
⚠️ Moderate learning curve |
✅ Easiest |
✅ Easy |
|
Community |
✅ Large & growing |
✅ Large |
✅ Moderate |
|
Workflow Complexity |
✅ Unlimited |
⚠️ Limited branching |
✅ Good |
Verdict: If you’re building serious AI agents and want flexibility without paying per task, n8n is the clear winner in 2026. Zapier is better for simple, quick automations. Make is a middle ground. For AI agents specifically, n8n is in a league of its own.
Tools & Requirements Before You Start
Before building your first AI agent, here’s what you need. Don’t worry — most of it is free.
Required Tools
- n8n Account (Cloud or Self-Hosted) – Cloud (easiest): Sign up at n8n.io — free trial available, paid plans from ~$24/month – Self-hosted (cheapest): Install on a VPS (like DigitalOcean, Hetzner) using Docker — costs ~$5–10/month
# Quick self-hosted setup with Docker
docker run -it –rm \
–name n8n \
-p 5678:5678 \
-v ~/.n8n:/home/node/.n8n \
docker.n8n.io/n8nio/n8n
- OpenAI API Key – Sign up at platform.openai.com – Create an API key under “API Keys” – GPT-4o is recommended for complex agents; GPT-4o-mini for cost-efficient workflows – Budget tip: Start with GPT-4o-mini — it handles 90% of agent tasks at ~10x lower cost
- A Trigger Source (one of the following) – Webhook URL (built into n8n) – Schedule trigger (cron-based) – Email trigger – Form submission (Typeform, Tally, etc.)
Optional Integrations (for advanced workflows)
- Airtable or Google Sheets — store leads, logs, or knowledge base data
- Notion — for content workflows and knowledge management
- Gmail or SMTP — for sending AI-generated emails
- Slack — for team notifications from your agent
- Pinecone or Supabase Vector — for long-term memory and RAG
Step-by-Step Guide: Building Your First AI Agent with n8n
This is the core of the guide. We’re going to build a Lead Qualification AI Agent — one of the most immediately useful and business-impactful workflows you can create.
What it does: 1. Receives a form submission (name, email, company, message) 2. Uses AI to score the lead and extract intent 3. Sends a personalized response email 4. Logs the qualified lead to a Google Sheet
This workflow is production-ready and can be adapted for any use case.
Step 1: Set Up n8n and Create a New Workflow
If using n8n Cloud: 1. Log into your n8n dashboard at app.n8n.cloud 2. Click “New Workflow” in the top right 3. Give it a name: Lead Qualification AI Agent
If self-hosting: 1. Open n8n at http://localhost:5678 2. Create a new workflow the same way
You’ll land on the n8n canvas — a blank visual workspace where you drag and connect nodes.
Pro Tip: Use Ctrl+Shift+K (Windows/Linux) or Cmd+Shift+K (Mac) to open the node picker quickly. It saves a lot of time.
Step 2: Add a Webhook Trigger (Your Agent’s Entry Point)
Every workflow needs a trigger — the event that kicks everything off.
- Click the “+” button on the canvas
- Search for “Webhook” and select it
- Set HTTP Method to POST
- Copy the Webhook URL — you’ll use this in your form or test tool
- Click “Listen for Test Event” to activate it
Test your webhook: Use a tool like Hoppscotch or curl to send a test payload:
{
“name”: “Sarah Johnson”,
“email”: “sarah@techstartup.com”,
“company”: “TechStartup Inc.”,
“message”: “Hi, we’re interested in your enterprise plan. We have a team of 50 and need custom integrations.”
}
Once n8n receives this, you’ll see the data appear in the node’s output. You’re in business.
Step 3: Connect Your OpenAI API Key
Before building agent logic, add your OpenAI credentials to n8n.
- Click your profile icon → “Credentials”
- Click “Add Credential” → search for “OpenAI”
- Paste your API key from openai.com
- Name it OpenAI Main and save
Now n8n can securely talk to OpenAI in any workflow.
Step 4: Add the AI Agent Node
This is where the magic happens.
- On the canvas, click “+” after your webhook node
- Search for “AI Agent” and select it
- In the node settings:
- Chat Model: Select OpenAI → choose gpt-4o-mini (or gpt-4o for more complex reasoning)
- Credential: Select OpenAI Main
Now, configure your System Prompt. This is the most important part — it defines your agent’s personality, goals, and behavior.
Example System Prompt for Lead Qualification:
You are a professional lead qualification assistant for [Your Company Name].
Your job is to analyze incoming lead submissions and:
1. Score the lead from 1-10 based on these criteria:
– Company size mentioned (larger = higher score)
– Urgency signals in the message (e.g., “ASAP”, “this week”)
– Fit with our enterprise/SMB offering
– Clarity of use case
2. Extract the lead’s primary pain point or need in one sentence.
3. Write a personalized, warm follow-up email (subject line + body) that:
– Addresses them by first name
– Acknowledges their specific need
– Proposes a 20-minute discovery call
– Is 100-150 words — no fluff
Return your response as valid JSON in this exact format:
{
“score”: <number 1-10>,
“intent_summary”: “<one sentence>”,
“email_subject”: “<subject line>”,
“email_body”: “<full email body>”
}
In the “User Message” field, reference the webhook data:
Analyze this new lead:
Name: {{ $json.name }}
Email: {{ $json.email }}
Company: {{ $json.company }}
Message: {{ $json.message }}
This passes your live webhook data directly into the AI’s context. Every lead gets a fully personalized analysis.
Pro Tip: Always ask the AI to return structured JSON when you need to parse and use its output downstream. It makes your workflow far more reliable.
Step 5: Parse the AI’s JSON Response
The AI returns a JSON string. You need to parse it into usable data.
- Add a “Code” node after the AI Agent
- Select JavaScript and enter:
const rawText = $input.first().json.output;
// Strip markdown code blocks if present
const cleaned = rawText.replace(/“`json\n?/g, ”).replace(/“`\n?/g, ”).trim();
const parsed = JSON.parse(cleaned);
return {
score: parsed.score,
intent_summary: parsed.intent_summary,
email_subject: parsed.email_subject,
email_body: parsed.email_body
};
This gives you clean, structured data for all the downstream nodes.
Step 6: Add a Conditional Branch (Route by Lead Score)
Now let’s add intelligence to the workflow routing.
- Add an “If” node after the Code node
- Set condition: {{ $json.score }}Greater Than or Equal To 7
This creates two branches: – True branch (score ≥ 7): High-value lead → immediate personalized email + CRM entry – False branch (score < 7): Lower-priority lead → added to nurture list only
This is where n8n shines over basic tools — real conditional logic that responds dynamically to AI output.
Step 7: Send the AI-Generated Email (True Branch)
- On the True branch, add a “Gmail” (or “Send Email” / “SMTP”) node
- Configure:
- To: {{ $(‘Webhook’).item.json.email }}
- Subject: {{ $json.email_subject }}
- Body: {{ $json.email_body }}
- Connect your Gmail or SMTP credentials
Every qualified lead now automatically receives a personalized email that reads like a human wrote it — because AI helped you write it, intelligently tailored to their message.
Step 8: Log to Google Sheets
- After the email node, add a “Google Sheets” node
- Set the operation to “Append Row”
- Connect your Google account
- Map the columns:
- Name → {{ $(‘Webhook’).item.json.name }}
- Email → {{ $(‘Webhook’).item.json.email }}
- Company → {{ $(‘Webhook’).item.json.company }}
- Score → {{ $json.score }}
- Intent → {{ $json.intent_summary }}
- Date → {{ $now }}
Now every qualified lead is automatically logged with AI-generated context — no manual data entry.
Step 9: Add Error Handling
Robust agents handle failures gracefully. Don’t skip this step.
- On every critical node (AI Agent, Email, Sheets), click the three-dot menu → “Settings”
- Enable “Continue on Fail” — this prevents one error from breaking the whole workflow
- Add an “Error Trigger” node to your workflow
- Connect it to a Slack or Email node that notifies you when something breaks
Add a fallback in your Code node:
try {
const rawText = $input.first().json.output;
const cleaned = rawText.replace(/“`json\n?/g, ”).replace(/“`\n?/g, ”).trim();
const parsed = JSON.parse(cleaned);
return parsed;
} catch (error) {
// Return safe defaults if AI returns malformed JSON
return {
score: 5,
intent_summary: “Unable to parse intent — manual review needed”,
email_subject: “Thanks for reaching out”,
email_body: “Hi, thanks for your message. A member of our team will be in touch shortly.”
};
}
Step 10: Test and Deploy
Testing: 1. Click “Execute Workflow” in n8n 2. Send a test payload to your webhook URL 3. Watch each node light up green (or red, if there’s an issue) 4. Check your email inbox and Google Sheet — they should populate
Deploying: 1. Toggle the workflow from “Inactive” to “Active” (top right switch) 2. Your webhook URL is now live 24/7 3. Update your contact form, landing page, or wherever leads come from to POST to this URL
Congratulations — your AI agent is live.
Real Use Cases: What You Can Build with n8n AI Agents
The lead qualification agent above is just the beginning. Here are four more high-impact use cases, each adaptable from the workflow you just built.
1. AI Customer Support Bot
Workflow: Website chat/email → AI Agent with knowledge base (RAG) → Categorize + respond → Escalate if needed
What makes it powerful: Connect a vector database (like Pinecone or Supabase Vector) containing your docs, FAQs, and product info. The agent retrieves relevant context before answering — so it never hallucinates about your specific product.
Business impact: Handles 60–80% of support tickets automatically. Humans only handle the 20% that genuinely need them.
2. AI Content Generation Pipeline
Workflow: Google Sheet with topic list → Schedule trigger (daily) → AI Agent researches + writes → Format as blog post → Publish to CMS → Notify editor on Slack
What makes it powerful: Chain multiple AI calls — one for research, one for writing, one for SEO optimization. Each specializes in one task, producing better output than a single “write me an article” prompt.
3. Email Automation Agent
Workflow: Gmail trigger (new email) → AI classifies intent → Route to appropriate response template → Personalize with AI → Send reply → Log to CRM
What makes it powerful: The AI reads the emotional tone and urgency of incoming emails, not just keywords. It can draft replies that match the context of a 3-email conversation thread, not just the latest message.
4. Social Media Monitoring Agent
Workflow: RSS/Twitter/Reddit trigger → AI analyzes sentiment + relevance → Filter for high-value mentions → Draft response or alert → Post or notify team
What makes it powerful: Instead of monitoring every mention manually, the agent surfaces only the ones that matter — competitor comparisons, purchase intent signals, or reputation risks.
Best Practices for Building n8n AI Agents That Actually Work
Having built dozens of these workflows, here are the practices that separate amateur automations from production-grade agents.
Prompt Engineering Best Practices
Be specific about output format. Always tell the AI exactly what format to return data in. “Return valid JSON with these exact fields” is 10x better than “give me the information.”
Give the AI a persona. “You are a professional sales development representative at [Company]” produces dramatically better output than “You are an AI assistant.”
Include negative instructions. Tell the AI what NOT to do: “Do not mention pricing. Do not promise delivery timelines. Do not use the word ‘absolutely’.”
Use few-shot examples for edge cases. If you have tricky categories or edge cases, give the AI 2–3 examples of how to handle them in the system prompt. This dramatically improves consistency.
Workflow Architecture Best Practices
One node, one job. Don’t ask a single AI call to classify, respond, AND extract data. Split these into separate calls. The output will be cleaner and easier to debug.
Log everything. Add a Google Sheets or database node that logs every run — input data, AI output, timestamp, and success/failure. You’ll thank yourself when debugging.
Test with edge cases. Before deploying, test with weird inputs: empty fields, very long messages, non-English text, spam submissions. Your workflow will encounter these in production.
Version your workflows. Duplicate your workflow before making major changes. n8n doesn’t have native version control, so this manual habit saves you from breaking production.
Security Best Practices
Never hardcode API keys. Always use n8n’s Credentials system — never paste keys directly into node fields or expressions.
Validate webhook inputs. Add a basic input validation step early in your workflow. If expected fields are missing, return an error immediately rather than letting malformed data propagate.
Use webhook authentication. For production webhooks, enable header-based authentication in the Webhook node settings to prevent unauthorized requests.
Limit AI output scope. If your agent can take real actions (send emails, update records), design safeguards that require human approval for high-stakes actions.
Scaling Your AI Agent
Use queuing for high-volume workflows. If your webhook receives hundreds of requests per minute, enable n8n’s built-in queue mode (available in self-hosted) to process them reliably.
Cache repeated AI calls. If many leads ask similar questions, consider caching common AI responses in a lookup table (Airtable or Redis) before hitting the LLM. This reduces cost and latency.
Monitor your OpenAI spend. Set hard spending limits in your OpenAI dashboard. A runaway workflow can burn through API credits fast.
⚠️ Common Mistakes to Avoid (Learn From These Before You Make Them)
Mistake 1: Writing Vague System Prompts
Wrong: “You are a helpful assistant. Analyze this lead and respond.”
Right: A 200-word system prompt that specifies persona, scoring criteria, output format, tone, word count, and what NOT to include.
Vague prompts produce inconsistent, unpredictable output. In a production automation, inconsistency is a bug.
Mistake 2: No Fallback Logic
If the AI returns malformed JSON, what happens? If the email node fails, does the lead disappear? Design for failure at every step. Add error handling, defaults, and notification nodes. Workflows without fallbacks are landmines.
Mistake 3: Over-Engineering Too Early
Start with the simplest possible version that works. A 4-node workflow that runs reliably beats a 40-node masterpiece that breaks every third trigger. Add complexity only after the core loop is proven.
Mistake 4: Not Testing with Real Data
Testing with perfect, clean test data and then deploying to live, messy real-world data is a recipe for surprises. Before going live, run 20–30 real past examples through your workflow and manually verify each output.
Mistake 5: Ignoring Costs
GPT-4o on a high-volume workflow can get expensive fast. Always estimate your monthly cost: (average tokens per run) × (cost per 1M tokens) × (expected runs per month). Switch to GPT-4o-mini for workflows where top-tier reasoning isn’t required.
Frequently Asked Questions
Can beginners build AI agents with n8n? Yes. n8n’s visual interface is designed for non-developers. If you can use Notion or Airtable, you can use n8n. The AI Agent node has guided setup, and the n8n community offers thousands of workflow templates to start from. You’ll need to understand basic concepts like webhooks and APIs, but this guide and n8n’s own documentation cover those clearly.
Is n8n free to use? n8n is free to self-host — you only pay for server costs (typically $5–10/month on a basic VPS). The cloud version offers a free trial, with paid plans starting around $24/month. For most small businesses, self-hosting n8n is the most cost-effective option, especially compared to Zapier’s per-task pricing.
Do I need coding skills to build AI agents in n8n? No coding skills are required for most workflows. n8n’s visual node interface handles logic, connections, and data mapping without code. However, basic familiarity with JavaScript expressions (like {{ $json.email }}) is very helpful, and optional Code nodes let you do more advanced data manipulation if needed.
What’s the difference between n8n and Zapier for AI agents? The key differences are flexibility and cost. Zapier is simpler but charges per task and has limited AI capabilities. n8n is more powerful — it has a native AI Agent node, supports any LLM, allows custom code, and can be self-hosted for near-zero marginal cost. For basic automations, Zapier works fine. For serious AI agents, n8n is significantly better.
Which AI model should I use with n8n? For most business workflows, GPT-4o-mini offers the best cost-to-performance ratio — it handles classification, email drafting, and data extraction very well at roughly 10x less cost than GPT-4o. Use GPT-4o for complex reasoning tasks — multi-step analysis, nuanced customer support, or strategic decision-making. You can also use Anthropic’s Claude or Google’s Gemini through n8n’s LangChain integration.
Can n8n agents remember previous conversations? Yes. n8n’s AI Agent node includes built-in memory options: Window Buffer Memory (remembers the last N messages) and Vector Store Memory (long-term semantic memory across sessions). For a customer support agent, you’d typically use Window Buffer Memory scoped to a session ID, so each user’s conversation stays coherent.
How do I handle large volumes of requests with n8n? For high-volume production use, self-host n8n in queue mode with a Redis backend. This allows horizontal scaling — you can run multiple worker instances processing tasks in parallel. The n8n documentation has a detailed guide on scaling with queue mode. For most small-to-medium businesses, a single n8n instance handles hundreds of daily workflows without issues.
Conclusion: Your AI Agent Is Ready — Now What?
Building AI agents with n8n in 2026 is genuinely accessible to anyone willing to spend a few hours learning the tool. You don’t need to be a developer. You don’t need to understand machine learning. You need a clear workflow goal, the right prompts, and a willingness to iterate.
Here’s what you’ve learned in this guide: – What AI agents are and how they differ from basic automation – Why n8n is the best platform for building flexible, cost-effective AI agents – How to build a complete lead qualification AI agent step by step — from webhook to deployed workflow – Four real use cases you can build next – Best practices and common mistakes from real-world workflow experience
The businesses and creators who automate intelligently in 2026 are building an enormous competitive advantage over those who don’t. Every hour your AI agent saves is an hour you spend on higher-value work.
Your Next Steps
Start today:
- ✅ Try n8n Cloud for free — no credit card required for the trial
- ✅ Get your OpenAI API key at openai.com
- ✅ Follow this guide and build the lead qualification agent — it takes 60–90 minutes
- ✅ Join the n8n community at n8n.io — thousands of templates and active help
The best time to build your first AI agent was six months ago. The second best time is right now.
This article reflects hands-on experience building production AI workflows with n8n. All workflow examples are based on real patterns used in live deployments. API pricing and feature comparisons are accurate as of Q2 2026.
2 Comments
-
[…] How to Build an AI Agent with […]